Having recently changed jobs and become self-employed, I have a lot more spare time. What better way to spend it than getting an OpenVMS machines running on a Raspberry Pi.
These instructions are necessarily quick and make assumptions that you know what you’re doing. They’re also heavily influenced by this YouTube video, and I’m very grateful for the simple explanation of Linux bridge and tap interfaces.
The basics
I started by copying the 32-bit version of Ubuntu 18.04LTS for the Raspberry Pi 3 on to an SD card. Pop that in your Pi and boot up with an Ethernet cable connected and a DHCP server available. There’s no need to attach a keyboard or monitor – just ssh in to the server with username and password, and it’ll prompt you to change your password on first login.
Cloning the simh repository and installing dependencies is straightforward, and takes about four minutes in my Pi 3B+:
apt install make libsdl2-dev libpng-dev libpcap-dev libvdeplug-dev bridge-utils
git clone https://github.com/simh/simh.git
cd simh
make -j4 vax8600
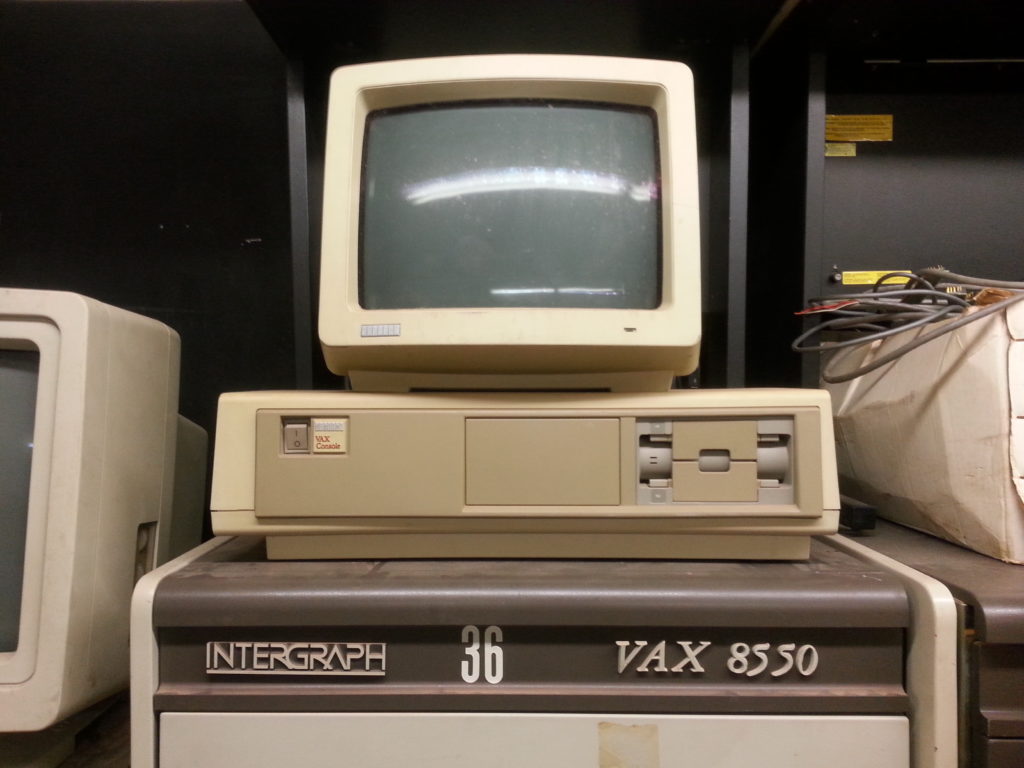
There are other targets you can build for, but we’re going to use the VAX 8600.
| Target | Simulator |
| microvax1 | MicroVAX I (KA610) |
| microvax2 | MicroVAX II (KA630) |
| microvax3900 | MicroVAX 3900 |
| rtvax1000 | rtVAX100 (KA620) |
| vax | MicroVAX 3900 |
| vax730 | VAX 11/730 |
| vax750 | VAX 11/750 |
| vax780 | VAX 11/780 |
| vax8200 | VAX 8200 (KA820) |
Whilst it’s compiling, create a directory to hold your SimH installation, and copy your OpenVMS 7.3 (VAX) ISO image over to it. I’ve used ~/simh, but you can use whatever you like as long as you’re consistent.
Create the file vax8600.ini with the following content. I’ve annotated each line so you can see what it does:
; Set the memory size to 512 megabytes
set cpu 512M

; Use a TCP socket for the console
set console telnet=12344

; Set the CPU idle detection method to VMS to improve performance when OpenVMS isn't doing anything
set cpu idle=vms

; Set the CPU to a model 8650 (https://en.wikipedia.org/wiki/VAX_8000)
set cpu model=8650

; Configure an 1.5 gigabyte RA92 disk (http://bitsavers.informatik.uni-stuttgart.de/pdf/dec/disc/ra90/EK-ORA90-SV-003_RA90_RA92_Service_Jun90.pdf) on disk interface RQ0
set rq0 ra92

; Attach a disk image to interface RQ0 - SimH will create this on boot
attach RQ0 rq0-ra92.dsk

; Configure a CD-ROM drive (RRD40) on disk interface RQ3
set rq3 cdrom

; Attach the installation disk ISO image to interface RQ3
attach RQ3 -r openvms73.iso

; Disable  the RP Massbus controller
set rp disable

; Disable the RL11 cartridge disk controller
set rl disable

; Disable the RK611 cartridge disk controller
set hk disable

; Disable the RX211 floppy disk controller
set ry disable

; Disable the ??
set ru disable

; Disable the TS11 magnetic tape controller
set ts disable

; Disable the TUK50 magnetic tape controller
set tq disable

; Disable the DZ11 8-line terminal multiplexer
set dz disable

; Disable the LP11 line printer
set lpt disable

; Enable the Ethernet controller
set xu enable

; Set the MAC address to use for the Ethernet controller
set xu mac=08-00-2b-00-00-0a

; Attach the Ethernet controller to a TAP interface 'vaxa'
attach xu tap:tapvax
When your VAX binary has compiled, copy it from simh/BIN/vax in to your VAX directory.
Setting up networking
We’re ready to boot our emulator, but we need to set up networking first. It’s not much fun to have a standalone VAX, so we’re going to create a TAP interface and a bridge to allow our VAX to access our network.
A TAP interface virtual interface which runs at the Data Link layer (MAC) and allows us to connect the VAX’s Ethernet interface to an interface on our host operating system.
Setting the TAP interface is as easy as running this command:
ip tuntap add mode tap user ubuntu tapvax
ip link set dev tapvax up
If you’re not running under user ‘ubuntu’, change it to your user name.
To access the network, we need to set up a bridge – which is like a switch (or hub, if you’ve been working with Ethernet for as long as I have) and connects many interfaces together. We’re going to create a bridge called ‘br0’, and add the ‘tapvax’ interface to it, and add the Pi’s ‘eth0’ interface.
My preferred way of doing this is to configure Netplan to do it for us. It’s quite straightforward – create /etc/netplan/01-network.yaml with the following:
network:
  version: 2
  renderer: networkd
  ethernets:
    eth0:
      dhcp4: no
  bridges:
    br0:
      dhcp4: yes
      interfaces:
        - eth0
After rebooting your Pi, you’ll have an interface named ‘br0’ with a DHCP-assigned IP address, and another interface named ‘eth0’ with no IP address. Here’s the first issue – I haven’t yet found a way to configure the TAP interface with NetPlan, so each time you reboot, you’ll have to run the TAP interface setup above.
Booting the emulator
Now comes the exciting part – run ./vax which will start and take a moment or two to create your RQ0 disk. At the simh> prompt, enter ‘boot dua3’. This will boot a minimal OpenVMS image to install the base system. It will ask for the date and time, so enter it – then it’ll search for and configure devices on your system.
Three devices should appear:
Available device DUA0: device type RA92
Available device DUA1: device type RD54
Available device DUA2: device type RD54
Available device DUA3: device type RRD40
DUA0 is your system disk. DUA1 and DUA2 aren’t connected but are available, and DUA3 is your CD-ROM image. Enter ‘YES’ when prompted, and you’ll be dropped at a ‘$’ prompt. Enter the following command:
BACKUP DUA3:VMS073.B/SAVE_SET DUA0:
This will copy over a minimal install of OpenVMS in about 3-4 minutes. To actually boot from this image, press CTRL+E, type ‘boot rq0’ and the emulator will reboot.
Installing OpenVMS
After entering the current date and time, you will be prompted to enter a volume label for the system disk. I use the nodename followed by SYS, but it can be anything from 1-12 characters.
Next, you’ll be asked which components you want to install. A reasonable set is:
- OpenVMS library
- OpenVMS optional
- OpenVMS Help Message
- DECnet Phase IV networking
Before installing DECnet Phase IV, you’ll be asked if you want to continue – just select yes.
A word on DECnet
Setting the SCSSYSTEMID parameter needs a bit of background knowledge about DECnet addressing. In short, DECnet addresses comprise an area (1 to 63) and a node (1 to 1023). There is a relationship between a DECnet address and a MAC address, and all DECnet hosts have a MAC address starting AA-00-04-00.
The SCSSYSTEMID is calculated by multiplying the DECnet area by 1024, and then adding the node number. For simplicity, I’ve used addresses 1.1 and 1.2 for my two hosts, which means the SCSSYSTEMIDs will be 1025 and 1026.
After DECnet Phase IV has been configured, you’ll be asked if you want to register any Product Authorization Keys. Select no – we’ll do that later.
Select your timezone and daylight savings settings, and the installation process will finish up by running AUTOGEN and rebooting.
Configuring your system
The first task to do is decompress the OpenVMS libraries. Disk space isn’t an issue, so we might as well run @SYS$UPDATE:LIBDECOMP.COM and decompress all libraries. This will take a while!
At this point, we should install the OpenVMS Hobbyist licences we’ve got. These can either by typed in at the console very slowly, or the script run from a CD-ROM image. We’re going to go with the latter.
To do this, copy the licence script in to a file called vms_paks.com and put this in a directory with no other files. The ‘mkisofs’ command will create an ISO image, and we run it as follows:
mkisofs . > /tmp/licence.iso
To make this image accessible to our OpenVMS machine, we need to quickly break out of the running operating system and type this at the console:
attach rq3 -r /tmp/licence.iso
When you’re back in OpenVMS, mount the image using the following command:
MOUNT/OVERRIDE=IDENTIFICATION DUA3
You can shorten OVERRIDE=IDENTIFICATION down to OVER=ID. This parameter tells OpenVMS to mount the image as-is, without trying to mount it according to the volume name.
We could run the script straight from our CD-ROM image by running @DUA3:[000000]VMS_PAKS.COM, but this won’t work – the line endings are wrong. To work around this, copy the file to your home directory and set some attributes on it:
COPY DUA3:[000000]VMS_PAKS.COM SYS$LOGIN
SET FILE/ATTRIBUTE=(RFM=STM) VMS_PAKS.COM
When you run @VMS_PAKS.COM, it’ll happily install all the licences. You can see what’s installed by running SHOW LICENSE:
Installing TCP/IP
Almost all conventional operating systems have an IP stack available by default. OpenVMS doesn’t, so it needs to be installed.
Before we install TCP/IP, we’ll need to increase the global pages value – by default, it’s 15000 and we need it to be higher.
EDIT/TPU SYS$SYSTEM:MODPARAMS.DAT
Add the following lines:
MIN_GBLPAGES=30000
ADD_INTSTKPAGES=12
Next, run AUTOGEN:
@SYS$UPDATE:AUTOGEN GETDATA SETPARAMS FEEDBACK
The installation is in the director TCPIP_VAX051 on the OpenVMS CD-ROM. We can mount it and install with the following commands:
MOUNT/OVER=ID DUA3:
SET DEFAULT DUA3:[TCPIP_VAX051.KIT]
PRODUCT INSTALL *
There isn’t much to configure with the initial installation, so we can start to configure:
@SYS$MANAGER:TCPIP$CONFIG.COM
Select option 1 – Core Environment, and option 2 – Interfaces. Select option 2 to use DHCP, and option 1 to enable DHCP_CLIENT.
That’s all folks
Wow, what a lot of work. Operating systems from decades past were installed and configured, then often never shut down for months or years. How times have changed.
As someone with fond memories as a VMS VAX 11/780 user (and later as a VAXstation 4000/60 workstation user) who now splits his time between Windows (MS-Office) and Linux (for ‘real’ data analysis and custom application programming), I’ve often wondered about SIMH but never took the plunge. (I’d describe myself as a power-user, but a reluctant sysmgr, especially with Linux and OpenVMS). Question: is there anything fundamentally special/unique about the Raspberry Pi as a CPU platform for SIMH as described above, or would the steps outlined above be quite similar if starting instead with a virtual 32-bit Linux guest OS running on a PC (e.g., using VirtualBox) ? Thanks!
It appears I don’t check the comments on my blog that often – sorry! There’s nothing special about the Pi – it just so happens that I have a few of them for project work and simh compiled for the Pi’s CPU runs the same as simh compiled for my desktop’s CPU.
It may be slower running under a Linux guest on VirtualBox (Type 2 Hypervisor), but I’ll bet it’s quite a bit quicker than an actual VAX would be!
Thanks for providing this! These instructions mostly worked as-is on a Raspberry Pi 4B running Raspbian 10 (Buster) and SimH 4.0, and I am running VMS 7.1 on a $35 computer! The only “challenge” I had was that SimH does not seem to recognize devices like dua0: or dua3:, so to boot off of the CD image I had to ‘boot rq3’, and to boot the installed VMS image I have to ‘boot rq0’. However, once it is running, openVMS sees dua0:, but SimH 4.0 still does not. Not sure if that makes sense?
Now that I have VAX/VMS 7.1 (openVMS? My experience was mostly with 5.x and 6.x, before the ‘Open’ was added), any advice as to where I can find any layered projects, such as TCP/IP Services for OpenVMS? Or even DECnet Phase IV for VMS 7.1? My memories are of Phase IV, but the 7.1 install image only includes DECnet Plus (overkill), and IV is apparently now a layered product.
Any advice or pointers would be appreciated. Thanks! 🙂
It’s been a while, but I think RQ3 is the hardware device name for what OpenVMS calls DUA3. I’d expect other operating systems to have different names. I don’t think I’ve run SimH 4.x so I’m not sure what’s going on.
Have you checked out vaxhaven.com’s CD image archive? It might have the layered product(s) you want in there. As for TCP/IP, I thought it was on the installation CD image. I don’t know about Phase IV – I went straight from NetWare and IPX to IP (with a bit of DEC LAT in the middle) and skipped DEC protocols!
Yeah, checked that archive, which is where I found the VMS 7.1 OS binaries. The good news is that I actually found both UCX and DECnet IV on the VMS071 CD image — in sub-directories, which I didn’t know about until I started poking around — but while I can install, I can’t run either without a license pak. And from what I can tell, nobody is issuing OpenVMS license paks anymore. Seems like HP got completely out of the business (March 2020?), and from what I can tell, turned everything over to VMS Software (which has no interest in the hobbyist program).
So while VAX/VMS seems to run standalone without a license — it just complains via a couple OPCOM messages upon every boot — none of the layered products do.
Process Software LLC has a TCPware package that they will license for “free” to hobbyist users, but unfortunately they require a checksum of the VMS license … but alas, it looks like I can no longer get one of those either.
Found an old CMU-TEK TCP/IP stack that I’ve just started tinkering with, but that is very old (1995) and requires some hacking to work with 7.x (last released on 6.x).
So I guess I retired and started playing with all of this a year or two too late … sigh …
Hello Dave,
An excellent job of documenting the installation process! I found you page when searching for instructions on setting up TAP devices for SimH and you are one of the few pages with concise instructions for setting up the bridge and TAPs.
As you have commented, the hobbyist license program was terminated last year and many people are now unable to use any system which required LMF (VMS 5.0 and above). A couple of years ago I created several distributions put together from various internet sources for VMS 4.0 through VMS 4.7. Have a search on groups.google.com simh if you are interested in giving them a try.
Best regards,
Andy Hoffman
Purely in the interests of research, there is a file called pakgen.c on several russian servers, which will compile and run under Ubuntu 18.04, Debian 10,11. It will generate valid keys for OpenVMS, and Alpha, with a little experimentation. The VAX Liberation Front (VLF) may also be able to help you. This is, though, not legal.
So you don’t mention that it doesn’t all work until half way though the process? What a dick move!
Thank you for taking the time to give your honest feedback. If you’d like to tell me how to fix the Netplan and TAP interface issue, I’d be happy to update my original post.
You can still configure the network using /etc/network/interfaces
https://mike632t.wordpress.com/2020/05/02/networking-with-simh-or-qemu-on-debian-buster/
Still works on bullseye
This is driving me nuts. It seems you and everyone else just kind of skip over this problem like it should be obvious but it is not.
Up to now I’ve been using the following demo page:
https://www.openvmshobby.com/vax-vms/openvms-on-vax-simh/
The demo command below shows them downloading the ISO zip file and then copying the ISO file to the designated ISO directory and then ASSIGNing the DQ0 device to the ISO filename.
******************************************************************************
5. Download the VAX/VMS 7.1 disk image using a web browser & install into the ISO directory
http://vaxhaven.com/cd-image/AG-QSBWB-BE.iso.zip
# cp AG-QSBWB-BE.ISO /opt/simulators/vax8600/iso/VAXVMS071.iso
; Configure a CD-ROM drive (RRD40) on disk interface RQ3
set rq3 cdrom
; Attach the installation disk ISO image to interface RQ3
attach RQ3 -r /opt/simulators/vax8600/iso/VAXVMS071.iso
******************************************************************************
The problem is this.
How do you go from downloading the zipped ISO file to copying the unzipped file into the directory?
You can’t unzip a VMS ISO file onto a Windows, Unix or Linux system without corrupting the VMS ODS file system, at least I’ve never been able to get it to work. I’ve always had to copy or FTP the zipped file onto a running VMS system and do the unzip there in order to maintain the VMS file attributes intact so that the ISO remains readable to boot from.
In addition, my SimH installation seems to ignore my .ini file, as nothing gets executed. The tutorial says to put the ini file in the /data directory but that doesn’t work. I know this because when I try to boot the RQ3 device, it tells me it cannot find the device and if I enter the same .ini file commands manually, at the SIMH> command prompt, I get a “can’t find the boot file” error which tells me it cannot read the ISO file because the ODS formatting is gone. That is EXACTLY the same problem I’ve gotten every time I have ever tried to download a VMS ISO, or updates, from a website onto my computer and create a CD from that ISO file and then taken that ISO and tried to get a VMS system to boot from it. The ONLY way I have ever been able to get a VMS system ISO to be readable by the VAX boot firmware or in VMS itself is to download the VMS files or ISO in .zip format and then copy or FTP the zipped file to VMS and unzip the file ON a running VMS system.
Yet all these tutorials just download ISO’s and copy them to directories on various non-VMS systems and just carry on like it is the most straightforward thing in the world. HOW???
If I understand you correctly, you’re having trouble unzipping and copying the ISO file to your target. On a macOS system, it’s just a case of double-clicking on the downloaded ZIP file and it’ll expand in to an ISO file. Windows will probably do the same – but don’t try to unzip the actual ISO file.
What operating system are you using? I, or somebody else here, might be able to give you some more tailored help.