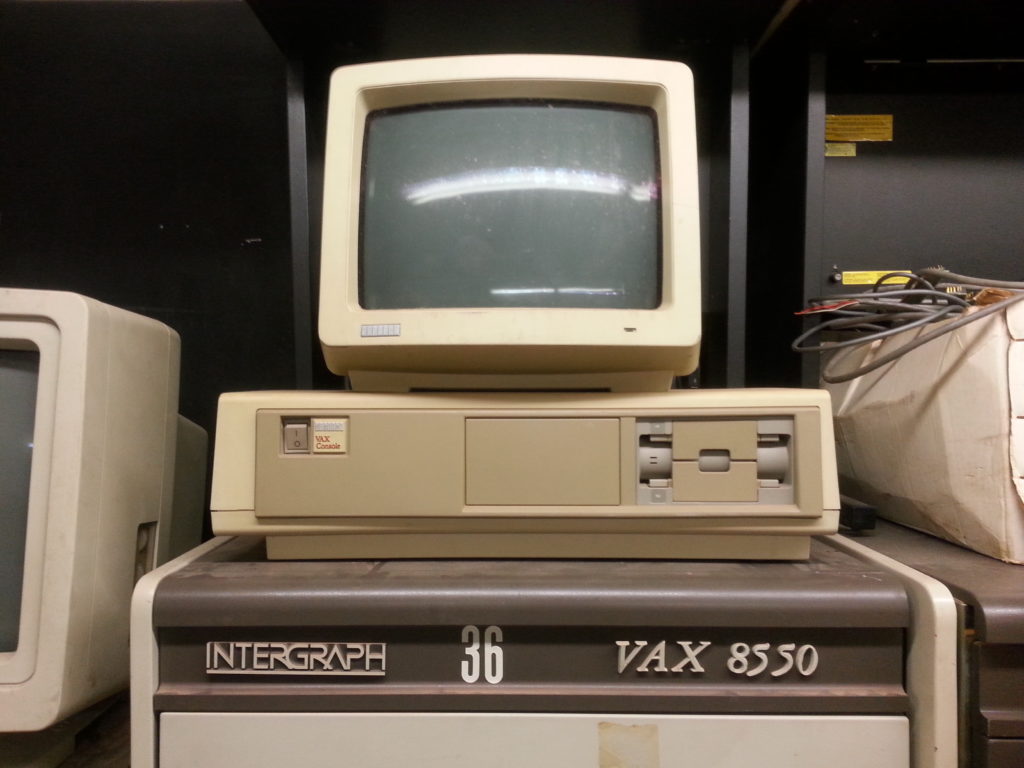
I’ve had a VAXstation 3100 M38 sitting in my flat for years, but it doesn’t quite work. I’ll write up the repair process elsewhere, but as part of troubleshooting I decided to see what’s on some of the ROMS.
There are two M27C1024 chips installed on the main board. These are STMicroelectronics chips, both 1Mbit EPROMs. Reading them on Minipro produced an interesting error:
Maybe this is a DEC variant. Throwing caution to the wind, I re-ran Minipro with the -y switch to ignore the error. This produced a 131,072 byte file for each chip, which is correct for a 1Mbit IC because 131072 bytes is 1 megabit.
The contents of the files were all over the place – nothing stood out as text except for this:
) ns Fn
s uie mae) 1Desc 9)taan
Dts (hwz) 10Nerlds 3Enis 1)or
) glh rishri) 1 Ptu
s 5Es
o 3)uo
) anis 1 Sns
) anisCadi) 1 Vam
If you’ve used a VAX before, you might recognise that this looks a little like the language selection menu:
0) Dansk                      8) Français (Suisse Romande)
1) Deutsch                    9) Italiano
2) Deutsch (Schweiz)         10) Nederlands
3) English                   11) Norsk
4) English (British/Irish)   12) Português
5) Español                   13) Suomi
6) Français                  14) Svenska
7) Français (Canadien)       15) Vlaams
Since this is the second ROM of a pair, let’s look at what the first contains:
0Dak 8)raai(SssRond ) uth Ilio 2)euchScei ) dean ) glh 1 Nsk 4Enis(Bti/Ish 2)orgu ) pal 1 Smi 6Fr a 4)veka 7Fr a (naen 5)las
If we take two bytes from one ROM, and two bytes from the second ROM, we can take a guess as to how the image is laid out. The characters “En” are from the the second ROM, “gl” from the first ROM, “is” from the second ROM, “h ” from the first ROM, and so on.
If it sounds like madness, but the datasheet makes it clear why:
It is ideally suited for microprocessor systems requiring large data or program storage and is organized as 65,536 words of 16 bits.
This handy bit of Python code will reassemble the data by reading two bytes from one file, two bytes from the second and so on:
#!/usr/bin/env python
#
#  Read the content of two files and output an interleaved file
#

from pathlib import Path

INTERLEAVE = 2
FILE_A = './rom1.bin'
FILE_B = './rom2.bin'

if Path(FILE_A).stat().st_size != Path(FILE_B).stat().st_size:
    print('Files differ')

fileA = open(FILE_A, 'rb')
fileB = open(FILE_B, 'rb')

data = b""

for n in range(Path(FILE_A).stat().st_size):
    data = data + fileA.read(2)
    data = data + fileB.read(2)

f = open('./out.bin', 'w+b')
f.write(data)
f.close()
How do we know it’s worked? Simple – the content of the binary file is exactly the same as the original KA42B firmware!
Having recently changed jobs and become self-employed, I have a lot more spare time. What better way to spend it than getting an OpenVMS machines running on a Raspberry Pi.
These instructions are necessarily quick and make assumptions that you know what you’re doing. They’re also heavily influenced by this YouTube video, and I’m very grateful for the simple explanation of Linux bridge and tap interfaces.
The basics
I started by copying the 32-bit version of Ubuntu 18.04LTS for the Raspberry Pi 3 on to an SD card. Pop that in your Pi and boot up with an Ethernet cable connected and a DHCP server available. There’s no need to attach a keyboard or monitor – just ssh in to the server with username and password, and it’ll prompt you to change your password on first login.
Cloning the simh repository and installing dependencies is straightforward, and takes about four minutes in my Pi 3B+:
apt install make libsdl2-dev libpng-dev libpcap-dev libvdeplug-dev bridge-utils
git clone https://github.com/simh/simh.git
cd simh
make -j4 vax8600
There are other targets you can build for, but we’re going to use the VAX 8600.
Target
Simulator
microvax1
MicroVAX I (KA610)
microvax2
MicroVAX II (KA630)
microvax3900
MicroVAX 3900
rtvax1000
rtVAX100 (KA620)
vax
MicroVAX 3900
vax730
VAX 11/730
vax750
VAX 11/750
vax780
VAX 11/780
vax8200
VAX 8200 (KA820)
VAX architecture build targets for SimH
Whilst it’s compiling, create a directory to hold your SimH installation, and copy your OpenVMS 7.3 (VAX) ISO image over to it. I’ve used ~/simh, but you can use whatever you like as long as you’re consistent.
Create the file vax8600.ini with the following content. I’ve annotated each line so you can see what it does:
; Set the memory size to 512 megabytes
set cpu 512M

; Use a TCP socket for the console
set console telnet=12344

; Set the CPU idle detection method to VMS to improve performance when OpenVMS isn't doing anything
set cpu idle=vms

; Set the CPU to a model 8650 (https://en.wikipedia.org/wiki/VAX_8000)
set cpu model=8650

; Configure an 1.5 gigabyte RA92 disk (http://bitsavers.informatik.uni-stuttgart.de/pdf/dec/disc/ra90/EK-ORA90-SV-003_RA90_RA92_Service_Jun90.pdf) on disk interface RQ0
set rq0 ra92

; Attach a disk image to interface RQ0 - SimH will create this on boot
attach RQ0 rq0-ra92.dsk

; Configure a CD-ROM drive (RRD40) on disk interface RQ3
set rq3 cdrom

; Attach the installation disk ISO image to interface RQ3
attach RQ3 -r openvms73.iso

; Disable  the RP Massbus controller
set rp disable

; Disable the RL11 cartridge disk controller
set rl disable

; Disable the RK611 cartridge disk controller
set hk disable

; Disable the RX211 floppy disk controller
set ry disable

; Disable the ??
set ru disable

; Disable the TS11 magnetic tape controller
set ts disable

; Disable the TUK50 magnetic tape controller
set tq disable

; Disable the DZ11 8-line terminal multiplexer
set dz disable

; Disable the LP11 line printer
set lpt disable

; Enable the Ethernet controller
set xu enable

; Set the MAC address to use for the Ethernet controller
set xu mac=08-00-2b-00-00-0a

; Attach the Ethernet controller to a TAP interface 'vaxa'
attach xu tap:tapvax
When your VAX binary has compiled, copy it from simh/BIN/vax in to your VAX directory.
Setting up networking
We’re ready to boot our emulator, but we need to set up networking first. It’s not much fun to have a standalone VAX, so we’re going to create a TAP interface and a bridge to allow our VAX to access our network.
A TAP interface virtual interface which runs at the Data Link layer (MAC) and allows us to connect the VAX’s Ethernet interface to an interface on our host operating system.
Setting the TAP interface is as easy as running this command:
ip tuntap add mode tap user ubuntu tapvax
ip link set dev tapvax up
If you’re not running under user ‘ubuntu’, change it to your user name.
To access the network, we need to set up a bridge – which is like a switch (or hub, if you’ve been working with Ethernet for as long as I have) and connects many interfaces together. We’re going to create a bridge called ‘br0’, and add the ‘tapvax’ interface to it, and add the Pi’s ‘eth0’ interface.
My preferred way of doing this is to configure Netplan to do it for us. It’s quite straightforward – create /etc/netplan/01-network.yaml with the following:
After rebooting your Pi, you’ll have an interface named ‘br0’ with a DHCP-assigned IP address, and another interface named ‘eth0’ with no IP address. Here’s the first issue – I haven’t yet found a way to configure the TAP interface with NetPlan, so each time you reboot, you’ll have to run the TAP interface setup above.
Booting the emulator
Now comes the exciting part – run ./vax which will start and take a moment or two to create your RQ0 disk. At the simh> prompt, enter ‘boot dua3’. This will boot a minimal OpenVMS image to install the base system. It will ask for the date and time, so enter it – then it’ll search for and configure devices on your system.
Three devices should appear:
Available device DUA0: device type RA92
Available device DUA1: device type RD54
Available device DUA2: device type RD54
Available device DUA3: device type RRD40
DUA0 is your system disk. DUA1 and DUA2 aren’t connected but are available, and DUA3 is your CD-ROM image. Enter ‘YES’ when prompted, and you’ll be dropped at a ‘$’ prompt. Enter the following command:
BACKUP DUA3:VMS073.B/SAVE_SET DUA0:
This will copy over a minimal install of OpenVMS in about 3-4 minutes. To actually boot from this image, press CTRL+E, type ‘boot rq0’ and the emulator will reboot.
Installing OpenVMS
After entering the current date and time, you will be prompted to enter a volume label for the system disk. I use the nodename followed by SYS, but it can be anything from 1-12 characters.
Next, you’ll be asked which components you want to install. A reasonable set is:
OpenVMS library
OpenVMS optional
OpenVMS Help Message
DECnet Phase IV networking
Before installing DECnet Phase IV, you’ll be asked if you want to continue – just select yes.
A word on DECnet
Setting the SCSSYSTEMID parameter needs a bit of background knowledge about DECnet addressing. In short, DECnet addresses comprise an area (1 to 63) and a node (1 to 1023). There is a relationship between a DECnet address and a MAC address, and all DECnet hosts have a MAC address starting AA-00-04-00.
The SCSSYSTEMID is calculated by multiplying the DECnet area by 1024, and then adding the node number. For simplicity, I’ve used addresses 1.1 and 1.2 for my two hosts, which means the SCSSYSTEMIDs will be 1025 and 1026.
After DECnet Phase IV has been configured, you’ll be asked if you want to register any Product Authorization Keys. Select no – we’ll do that later.
Select your timezone and daylight savings settings, and the installation process will finish up by running AUTOGEN and rebooting.
Configuring your system
The first task to do is decompress the OpenVMS libraries. Disk space isn’t an issue, so we might as well run @SYS$UPDATE:LIBDECOMP.COM and decompress all libraries. This will take a while!
At this point, we should install the OpenVMS Hobbyist licences we’ve got. These can either by typed in at the console very slowly, or the script run from a CD-ROM image. We’re going to go with the latter.
To do this, copy the licence script in to a file called vms_paks.com and put this in a directory with no other files. The ‘mkisofs’ command will create an ISO image, and we run it as follows:
mkisofs . > /tmp/licence.iso
To make this image accessible to our OpenVMS machine, we need to quickly break out of the running operating system and type this at the console:
attach rq3 -r /tmp/licence.iso
When you’re back in OpenVMS, mount the image using the following command:
MOUNT/OVERRIDE=IDENTIFICATION DUA3
You can shorten OVERRIDE=IDENTIFICATION down to OVER=ID. This parameter tells OpenVMS to mount the image as-is, without trying to mount it according to the volume name.
We could run the script straight from our CD-ROM image by running @DUA3:[000000]VMS_PAKS.COM, but this won’t work – the line endings are wrong. To work around this, copy the file to your home directory and set some attributes on it:
COPY DUA3:[000000]VMS_PAKS.COM SYS$LOGIN
SET FILE/ATTRIBUTE=(RFM=STM) VMS_PAKS.COM
When you run @VMS_PAKS.COM, it’ll happily install all the licences. You can see what’s installed by running SHOW LICENSE:
Installing TCP/IP
Almost all conventional operating systems have an IP stack available by default. OpenVMS doesn’t, so it needs to be installed.
Before we install TCP/IP, we’ll need to increase the global pages value – by default, it’s 15000 and we need it to be higher.
EDIT/TPU SYS$SYSTEM:MODPARAMS.DAT
Add the following lines:
MIN_GBLPAGES=30000
ADD_INTSTKPAGES=12
Next, run AUTOGEN:
@SYS$UPDATE:AUTOGEN GETDATA SETPARAMS FEEDBACK
The installation is in the director TCPIP_VAX051 on the OpenVMS CD-ROM. We can mount it and install with the following commands:
MOUNT/OVER=ID DUA3:
SET DEFAULT DUA3:[TCPIP_VAX051.KIT]
PRODUCT INSTALL *
There isn’t much to configure with the initial installation, so we can start to configure:
@SYS$MANAGER:TCPIP$CONFIG.COM
Select option 1 – Core Environment, and option 2 – Interfaces. Select option 2 to use DHCP, and option 1 to enable DHCP_CLIENT.
That’s all folks
Wow, what a lot of work. Operating systems from decades past were installed and configured, then often never shut down for months or years. How times have changed.
One of my recent retrocomputing projects was to set up a Novell NetWare 4.11 server and boot clients from it. Remote boot, or Remote Initial Program Load, was a common method for booting network clients over the LAN before IP became commonplace. RPL requires a boot ROM on the network card which finds a nearby server, connects to it and downloads a disk image which it then executes. By today’s standards, it’s trivial – but by late 1990s standards, it was anything but.
I spent a few hours trying to get VirtualBox to do RPL boot. Etherboot doesn’t appear to support RPL, so I tracked down a ROM image on Intel’s website. There isn’t much demand for RPL and Intel deprecated it in 2005. Luckily, they’ve kept an old version of their drivers available which contains a boot ROM image supporting RPL.
The executable, PRORPL.EXE, will uncompress using 7z and produce two interesting looking files with the extension FLB. One of these is 63,488 bytes, and the other is 139,264 bytes.
Installing these in a VirtualBox machine is straightforward but unfortunately undocumented:
After booting the virtual machine from cold, VirtualBox didn’t complain, but also didn’t use the ROM. Looking in the Log Viewer showed the vague message rc=VERR_TOO_MUCH_DATA.
The vital piece of information I forgot is that boot ROMs must be smaller than 64 kilobytes. The Intel image is very close to that size. Back to the drawing board!
With some further searching, I found a Generic BootRom Utility on AMD’s website which contains a 16kb file. This file, RBOOT.ROM, is a working RPL boot ROM for AMD PCnet network cards. Coincidentally, the VirtualBox machine I’m using has an AMD PCnet-FAST III card. Result!
Re-running the vboxmanage command above with the path to the newly discovered boot ROM works a treat. I can boot a virtual machine straight off a virtual Novell NetWare server. By today’s standards, the process is quite cumbersome but I’ll leave a description of that for another time.
And so, dusting off my knowledge of Novell Netware from years ago, I started to install NetWare 4.11 in VirtualBox.
Apparently this doesn’t work, but with some hackery thus, it’s fine:
1. Copy all the files off the installation CD in to a directory
2. Download updated NetWare ATA drivers with UDMA support
3. Assuming you unpacked the ZIP file above to /tmp/a, and the contents of the installation CD are in the current directory, do:
cp /tmp/a/NW3X-4X/NBI.NLM ./products/nw411/_/411/syspre/nbi.nlm
cp /tmp/a/NW3X-4X/NBI.NLM ./products/nw411/_/411/boot/nbi.nlm
cp /tmp/a/NW3X-4X/NWPALOAD.NLM ./products/nw411/ibm/411/diskdrv/nwpaload.nlm
cp /tmp/a/NW3X-4X/NWPA.NLM ./products/nw411/ibm/411/diskdrv/nwpa.nlm
cp /tmp/a/IDEATA.HAM ./products/nw411/ibm/411/diskdrv/ideata.ham
cp /tmp/a/IDEATA.DDI ./products/nw411/ibm/411/diskdrv/ideata.ddi
cp /tmp/a/IDECD.CDM ./products/nw411/ibm/411/diskdrv/idecd.cdm
cp /tmp/a/IDECD.DDI ./products/nw411/ibm/411/diskdrv/idecd.ddi
cp /tmp/a/IDEHD.CDM ./products/nw411/ibm/411/diskdrv/idehd.cdm
cp /tmp/a/IDEHD.DDI ./products/nw411/ibm/411/diskdrv/idehd.ddi
This will update the drivers on the installation CD with those supporting UDMA.
4. Create an ISO image of these files using “mkisofs -D -l . > ../netware411-patched.iso”
5. Install the server. INSTALL.NLM will throw up some errors, and you will need to enter slot 10002 for the IDEATA Disk Driver, but other than that, it’s fine.
Now if you’ll excuse me, I’m off to install Word 6 🙂