These devices connect to your WiFi network and allow you to switch a connected device on or off, on a schedule if you require, and also monitor power consumption. That last bit is the most important for me – knowing how much energy I’m consuming.
After researching Tasmota, an open firmware for simple home automation devices, and checking a bunch of reviews on the TP-Link Tapo P110‘s firmware, it looked like these P110s would do just what I needed – simple power monitoring for not much of an initial outlay.
LocalBytes were out of stock of both of these items when I looked, so I took the plunge and ordered one from elsewhere. Well, I ordered eight because I was feeling quite bold.
Initial setup
Trivial. Download the Android (or iOS presumably) app, plug in a device, find its wireless network and configure it to connect to your wireless network. It reboots and that’s about it.
Firmware updates can be scheduled automatically, but I don’t know whether this will switch the power off to any connected device or not. Something to check later.
Control and monitoring
The mobile app makes it quite easy to switch a device on and off, to set a schedule, and to see power consumption. But it’s a mobile app, and I want the data somewhere I can analyse it easily.
Home Assistant to the rescue! Running HA under Docker is really easy if you know Docker. I could have re-purposed one of my Raspberry Pi as I can’t get a new OpenVMS Community licence for VAX any more, but I wanted to try HA quickly to see if it fitted my needs.
Support for the P110 devices doesn’t come as standard, but there’s a community-written workaround for that. A little fiddly and not really what I’d expect, but it works.
Next steps
Oh boy, there’s a lot I want to do.
First off, I want to push the sensor data out from these devices in to an MQTT server such as Mosquitto and have Telegraf pull this data in to a time-series database so I can visualise it with Grafana.
Other things I want to do include automatically checking my Google Calendar and setting the heating to come up early when I’m doing a morning clinic, or having it come on a bit later when I’m at home that day. I want to get an inline power switch for my porch light and turn that on between dusk and sometime around midnight.
I’m a long-time user of Slack. Many of my customers use it, and we share channels to exchange information and work better together. I’m also a member of a number of other Slack workspaces for various projects.
The Linux app is great, with one exception – it’s very heavy on logging:
slack.desktop[27635]: [09/12/22, 13:58:26:475] info: API-Q cb429c3b-1662987506.474 client.shouldReload called with reason: polling
slack.desktop[27635]: [09/12/22, 13:58:26:475] info: API-Q cb429c3b-1662987506.474 client.shouldReload is ENQUEUED
slack.desktop[27635]: [09/12/22, 13:58:26:487] info: API-Q cb429c3b-1662987506.474 client.shouldReload is ACTIVE
slack.desktop[27635]: [09/12/22, 13:58:26:631] info: API-Q cb429c3b-1662987506.474 client.shouldReload is RESOLVED
slack.desktop[27635]: [09/12/22, 13:58:26:632] info: [MIN-VERSION] No need to reload
slack.desktop[27635]: [09/12/22, 13:58:34:433] info: DND_V2 Checking for changes in DND status for the following members: XXXXXXXXX,XXXXXXXXX,XXXXXXXXX
slack.desktop[27635]: [09/12/22, 13:58:34:435] info: DND_V2 Will check for changes in DND status again in 1.43 minutes
I don’t want my syslog littered with information that’s not useful! Other applications such as gnome-shell are pretty good at being verbose, but not to Slack’s extent.
The fix, thankfully, is super easy. Create a file named /etc/rsyslog.d/20-slack.conf with the following:
Drop info log messages from Slack
:rawmsg,contains,"slack.desktop" /dev/null
& stop
Run sudo systemctl reload rsyslogd and ta-da, no more Slack logging in your syslog.
A year or two ago, I took the plunge and had a smart meter installed. I naively thought that being able to read energy usage was a simple case of connecting a ConBee-II or similar to the ZigBee HAN.
To save anyone else from going through the same range of emotions as I did, here’s how you can read your own smart meter data.
Technology primer
Your electricity meter has two parts – a metering device, and a communications device located at the top. The electricity meter periodically sends energy usage information over a communications network to your supplier. It’s easy when you have a continual supply of electricity.
If you have a gas meter, it doesn’t have its own communications device. To do so would require a power supply to the gas meter – readily available on an electricity meter. Instead, the gas meter sends energy usage to the electricity meter every 30 minutes and therefore only has a long-life battery installed.
Getting access to the data
There are two ways to get access to real-time electricity and real-ish time gas usage data. Neither of them involve pairing your own device.
The best option is to buy a combined In-Home Display (IHD) and Customer Access Device (CAD) from Glow (Hildebrand Technology) sell a combined in-home display (IHD) and Customer Access Device (CAD) for around £65. This arrives already paired with your smart meter, and you connect it to your home wireless network, and it sends out data from your smart meter to an MQTT server (which can be on your local network too), ready for you to consume yourself. The device needs Internet access for firmware updates, but your data is kept locally.
The other option is to use intermediary such as Glowmarkt, who are a DCC Other User and can request your metering data from the Data Communications Company, then make it available to you. This is a straightforward process, although you need to go through an industry-mandated security process to prove you are requesting access to your data and not somebody else’s. They make your data available via their MQTT server, although it’s not at the same level of granularity as having your own IHD/CAD.
The data
You can use the CAD as a simple IHD – it’s a lot prettier than the one supplied by my energy supplier (which I can still use). Electricity usage arrives every few seconds, with gas usage as and when the metering equipment makes it available.
The real power comes when you work with data in real-time, or at least as close to real-time as it’ll give you. Want to work out how much the tumble dryer cost to run? Or find out whether you’re OK with having your home a little cooler to save a bunch of energy?
Data format
The MQTT messages you receive are in JSON format, and contain data for three ‘clusters’ – Metering (0x0702), Prepayment (0x0705) and Device Management (0x0708). Each of these clusters has an attribute set – the Metering cluster presents the Reading Information Set (0x00), Formatting (0x03) and Historical Consumption (0x04). Finally, each attribute set has a set of key/value pairs. From this, you can decode that cluster 0x0708 (Device Management), attribute set 0x01 (Supplier Control Attribute Set) value 0x01 is the provider name.
Since the data is sent in JSON format, it’s quite easy to parse. If you want to dive straight in to the detail about what clusters and attribute sets are, the ZigBee Smart Energy Standard is available, although at 628 pages, it’s a heavy read.
Problems
The entire process was quick – the CAD arrived within a day or two of placing my order and was ready to use the moment I plugged it in. Getting my data in real-time took a little longer – it’s a manual process for the staff at Glow, but once it’s set up, that’s it.
The only problem is that there’s no formal support. For the first six months, the CAD disconnected itself from my WiFi network for no reason. Despite posting about my issue, there’s was no progress on it – but out of the blue, a firmware update arrived which fixed the issue.
Is the lack of formal support a problem? Likely not – unless you’re having an issue. Since the firmware update, I’ve had no problems with the IHD, other than a lack of time to play with and analyse the data.
If a webpage tells you to run a command to import a GPG key when setting up an APT repository, it isn’t necessarily correct! Newer versions of Ubuntu no longer use apt-key and /etc/apt/trusted.gpg, preferring you put repository GPG keys in a file under /etc/apt/trusted.gpg.d.
Having recently reinstalled my desktop and not realising this, I had this exceedingly annoying error:
W: https://packagecloud.io/slacktechnologies/slack/debian/dists/jessie/InRelease: Key is stored in legacy trusted.gpg keyring (/etc/apt/trusted.gpg), see the DEPRECATION section in apt-key(8) for details.
This is one of the kinds of errors that tells you what you shouldn’t do, and isn’t too helpful about guiding you to what you should do.
As this is an easily forgettable problem, here’s how to fix it.
First, list the keys in /etc/apt/trusted.gpg:
gpg --keyring /etc/apt/trusted.gpg --list-keys
You will see a list of keys similar to the following:
Once again, I’ve spent far too long trying to work out how the heck to get a LetsEncrypt X.509 certificate on to the HPE Integrated Lights-Out 5 board.
To save me some time in three months, and to save you some time since you’re already here, the instructions are really straightforward. Be aware that this method uses a DNS-based challenge which may be tricky for you to do unless you can automate DNS updates.
First, from the iLO web interface, select Security and SSL Certificate, and click Customize Certificiate.
Next, Click Generate CSR and go back to the page in a few minutes when the certificate signing request (CSR) has been generated.
Copy the CSR in to a file on a machine with the ‘certbot’ client installed and run the following command:
certbot certonly --csr request.csr --preferred-challenges dns
When the certificate has been issued, select Import Certificate and paste in the entire PEM-formatted file.
A week or two ago, some of a number of servers became unreachable via Zabbix. Both pairs of servers (as we run everything in pairs) showed the same problem, and no other host did.
Looking in the Zabbix log showed this rather cryptic error:
SSL_shutdown() with 172.31.16.32 set result code to 6
That’s not very helpful, and several hours of head-scratching went by before we finally stumbled across what was happening.
The X.509 (or SSL) certificate on the target machine is issued by Let’s Encrypt, who are in the process of signing new certificates with a new key. Within Zabbix, we check that the certificate presented by the client when we connect is issued by a specific issuer and since this had changed, the server was refusing to connect.
How did we fix it? Really easily – by going in to the host configuration in Zabbix, and setting the issuer to:
CN=R3,O=Let's Encrypt,C=US
Ridiculously straightforward, and if you hover over the red ‘ZBX’ status box, you’ll see an error saying that the wrong issuer was found on the certificate.
That’s a few hours we’ll never get back, but it’s great to have solved the problem. And as it happens, there was a correlation between the servers affected – two pairs were built at the same time, and the remaining pair was built just about 90 days before the others. Let’s Encrypt certificates have a lifetime of 90 days.
We’re expecting further servers to drop off Zabbix, but at least we know why and we can fix it.
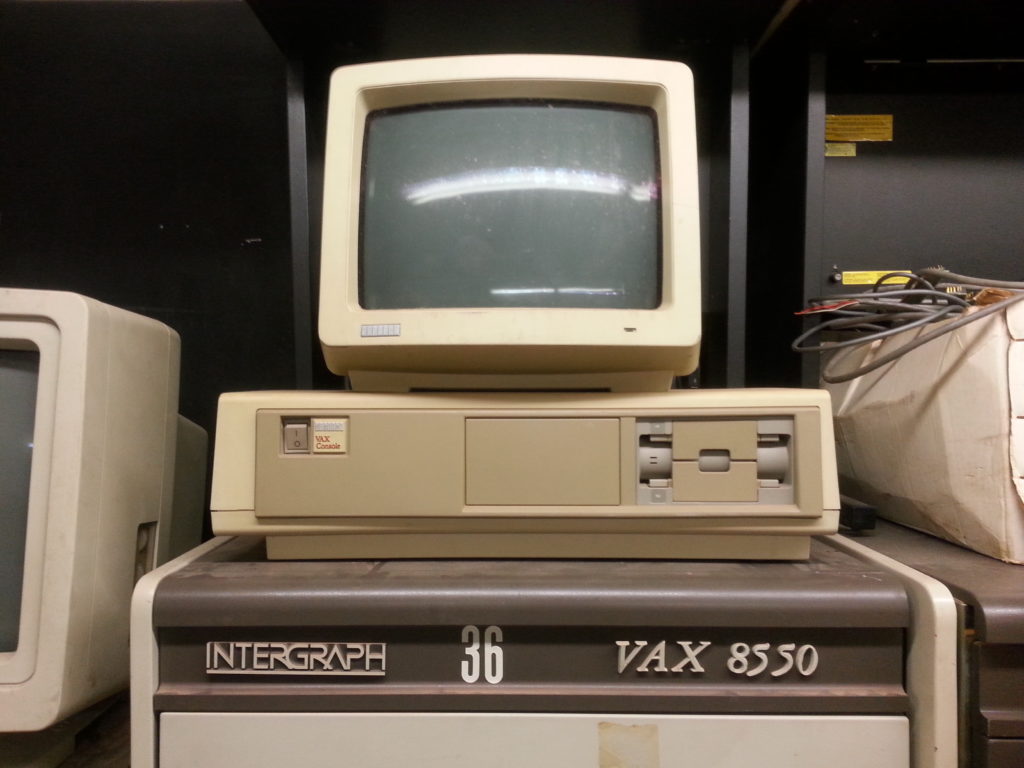
I’ve had a VAXstation 3100 M38 sitting in my flat for years, but it doesn’t quite work. I’ll write up the repair process elsewhere, but as part of troubleshooting I decided to see what’s on some of the ROMS.
There are two M27C1024 chips installed on the main board. These are STMicroelectronics chips, both 1Mbit EPROMs. Reading them on Minipro produced an interesting error:
Maybe this is a DEC variant. Throwing caution to the wind, I re-ran Minipro with the -y switch to ignore the error. This produced a 131,072 byte file for each chip, which is correct for a 1Mbit IC because 131072 bytes is 1 megabit.
The contents of the files were all over the place – nothing stood out as text except for this:
) ns Fn
s uie mae) 1Desc 9)taan
Dts (hwz) 10Nerlds 3Enis 1)or
) glh rishri) 1 Ptu
s 5Es
o 3)uo
) anis 1 Sns
) anisCadi) 1 Vam
If you’ve used a VAX before, you might recognise that this looks a little like the language selection menu:
0) Dansk                      8) Français (Suisse Romande)
1) Deutsch                    9) Italiano
2) Deutsch (Schweiz)         10) Nederlands
3) English                   11) Norsk
4) English (British/Irish)   12) Português
5) Español                   13) Suomi
6) Français                  14) Svenska
7) Français (Canadien)       15) Vlaams
Since this is the second ROM of a pair, let’s look at what the first contains:
0Dak 8)raai(SssRond ) uth Ilio 2)euchScei ) dean ) glh 1 Nsk 4Enis(Bti/Ish 2)orgu ) pal 1 Smi 6Fr a 4)veka 7Fr a (naen 5)las
If we take two bytes from one ROM, and two bytes from the second ROM, we can take a guess as to how the image is laid out. The characters “En” are from the the second ROM, “gl” from the first ROM, “is” from the second ROM, “h ” from the first ROM, and so on.
If it sounds like madness, but the datasheet makes it clear why:
It is ideally suited for microprocessor systems requiring large data or program storage and is organized as 65,536 words of 16 bits.
This handy bit of Python code will reassemble the data by reading two bytes from one file, two bytes from the second and so on:
#!/usr/bin/env python
#
#  Read the content of two files and output an interleaved file
#

from pathlib import Path

INTERLEAVE = 2
FILE_A = './rom1.bin'
FILE_B = './rom2.bin'

if Path(FILE_A).stat().st_size != Path(FILE_B).stat().st_size:
    print('Files differ')

fileA = open(FILE_A, 'rb')
fileB = open(FILE_B, 'rb')

data = b""

for n in range(Path(FILE_A).stat().st_size):
    data = data + fileA.read(2)
    data = data + fileB.read(2)

f = open('./out.bin', 'w+b')
f.write(data)
f.close()
How do we know it’s worked? Simple – the content of the binary file is exactly the same as the original KA42B firmware!
Having recently changed jobs and become self-employed, I have a lot more spare time. What better way to spend it than getting an OpenVMS machines running on a Raspberry Pi.
These instructions are necessarily quick and make assumptions that you know what you’re doing. They’re also heavily influenced by this YouTube video, and I’m very grateful for the simple explanation of Linux bridge and tap interfaces.
The basics
I started by copying the 32-bit version of Ubuntu 18.04LTS for the Raspberry Pi 3 on to an SD card. Pop that in your Pi and boot up with an Ethernet cable connected and a DHCP server available. There’s no need to attach a keyboard or monitor – just ssh in to the server with username and password, and it’ll prompt you to change your password on first login.
Cloning the simh repository and installing dependencies is straightforward, and takes about four minutes in my Pi 3B+:
apt install make libsdl2-dev libpng-dev libpcap-dev libvdeplug-dev bridge-utils
git clone https://github.com/simh/simh.git
cd simh
make -j4 vax8600
There are other targets you can build for, but we’re going to use the VAX 8600.
Target
Simulator
microvax1
MicroVAX I (KA610)
microvax2
MicroVAX II (KA630)
microvax3900
MicroVAX 3900
rtvax1000
rtVAX100 (KA620)
vax
MicroVAX 3900
vax730
VAX 11/730
vax750
VAX 11/750
vax780
VAX 11/780
vax8200
VAX 8200 (KA820)
VAX architecture build targets for SimH
Whilst it’s compiling, create a directory to hold your SimH installation, and copy your OpenVMS 7.3 (VAX) ISO image over to it. I’ve used ~/simh, but you can use whatever you like as long as you’re consistent.
Create the file vax8600.ini with the following content. I’ve annotated each line so you can see what it does:
; Set the memory size to 512 megabytes
set cpu 512M

; Use a TCP socket for the console
set console telnet=12344

; Set the CPU idle detection method to VMS to improve performance when OpenVMS isn't doing anything
set cpu idle=vms

; Set the CPU to a model 8650 (https://en.wikipedia.org/wiki/VAX_8000)
set cpu model=8650

; Configure an 1.5 gigabyte RA92 disk (http://bitsavers.informatik.uni-stuttgart.de/pdf/dec/disc/ra90/EK-ORA90-SV-003_RA90_RA92_Service_Jun90.pdf) on disk interface RQ0
set rq0 ra92

; Attach a disk image to interface RQ0 - SimH will create this on boot
attach RQ0 rq0-ra92.dsk

; Configure a CD-ROM drive (RRD40) on disk interface RQ3
set rq3 cdrom

; Attach the installation disk ISO image to interface RQ3
attach RQ3 -r openvms73.iso

; Disable  the RP Massbus controller
set rp disable

; Disable the RL11 cartridge disk controller
set rl disable

; Disable the RK611 cartridge disk controller
set hk disable

; Disable the RX211 floppy disk controller
set ry disable

; Disable the ??
set ru disable

; Disable the TS11 magnetic tape controller
set ts disable

; Disable the TUK50 magnetic tape controller
set tq disable

; Disable the DZ11 8-line terminal multiplexer
set dz disable

; Disable the LP11 line printer
set lpt disable

; Enable the Ethernet controller
set xu enable

; Set the MAC address to use for the Ethernet controller
set xu mac=08-00-2b-00-00-0a

; Attach the Ethernet controller to a TAP interface 'vaxa'
attach xu tap:tapvax
When your VAX binary has compiled, copy it from simh/BIN/vax in to your VAX directory.
Setting up networking
We’re ready to boot our emulator, but we need to set up networking first. It’s not much fun to have a standalone VAX, so we’re going to create a TAP interface and a bridge to allow our VAX to access our network.
A TAP interface virtual interface which runs at the Data Link layer (MAC) and allows us to connect the VAX’s Ethernet interface to an interface on our host operating system.
Setting the TAP interface is as easy as running this command:
ip tuntap add mode tap user ubuntu tapvax
ip link set dev tapvax up
If you’re not running under user ‘ubuntu’, change it to your user name.
To access the network, we need to set up a bridge – which is like a switch (or hub, if you’ve been working with Ethernet for as long as I have) and connects many interfaces together. We’re going to create a bridge called ‘br0’, and add the ‘tapvax’ interface to it, and add the Pi’s ‘eth0’ interface.
My preferred way of doing this is to configure Netplan to do it for us. It’s quite straightforward – create /etc/netplan/01-network.yaml with the following:
After rebooting your Pi, you’ll have an interface named ‘br0’ with a DHCP-assigned IP address, and another interface named ‘eth0’ with no IP address. Here’s the first issue – I haven’t yet found a way to configure the TAP interface with NetPlan, so each time you reboot, you’ll have to run the TAP interface setup above.
Booting the emulator
Now comes the exciting part – run ./vax which will start and take a moment or two to create your RQ0 disk. At the simh> prompt, enter ‘boot dua3’. This will boot a minimal OpenVMS image to install the base system. It will ask for the date and time, so enter it – then it’ll search for and configure devices on your system.
Three devices should appear:
Available device DUA0: device type RA92
Available device DUA1: device type RD54
Available device DUA2: device type RD54
Available device DUA3: device type RRD40
DUA0 is your system disk. DUA1 and DUA2 aren’t connected but are available, and DUA3 is your CD-ROM image. Enter ‘YES’ when prompted, and you’ll be dropped at a ‘$’ prompt. Enter the following command:
BACKUP DUA3:VMS073.B/SAVE_SET DUA0:
This will copy over a minimal install of OpenVMS in about 3-4 minutes. To actually boot from this image, press CTRL+E, type ‘boot rq0’ and the emulator will reboot.
Installing OpenVMS
After entering the current date and time, you will be prompted to enter a volume label for the system disk. I use the nodename followed by SYS, but it can be anything from 1-12 characters.
Next, you’ll be asked which components you want to install. A reasonable set is:
OpenVMS library
OpenVMS optional
OpenVMS Help Message
DECnet Phase IV networking
Before installing DECnet Phase IV, you’ll be asked if you want to continue – just select yes.
A word on DECnet
Setting the SCSSYSTEMID parameter needs a bit of background knowledge about DECnet addressing. In short, DECnet addresses comprise an area (1 to 63) and a node (1 to 1023). There is a relationship between a DECnet address and a MAC address, and all DECnet hosts have a MAC address starting AA-00-04-00.
The SCSSYSTEMID is calculated by multiplying the DECnet area by 1024, and then adding the node number. For simplicity, I’ve used addresses 1.1 and 1.2 for my two hosts, which means the SCSSYSTEMIDs will be 1025 and 1026.
After DECnet Phase IV has been configured, you’ll be asked if you want to register any Product Authorization Keys. Select no – we’ll do that later.
Select your timezone and daylight savings settings, and the installation process will finish up by running AUTOGEN and rebooting.
Configuring your system
The first task to do is decompress the OpenVMS libraries. Disk space isn’t an issue, so we might as well run @SYS$UPDATE:LIBDECOMP.COM and decompress all libraries. This will take a while!
At this point, we should install the OpenVMS Hobbyist licences we’ve got. These can either by typed in at the console very slowly, or the script run from a CD-ROM image. We’re going to go with the latter.
To do this, copy the licence script in to a file called vms_paks.com and put this in a directory with no other files. The ‘mkisofs’ command will create an ISO image, and we run it as follows:
mkisofs . > /tmp/licence.iso
To make this image accessible to our OpenVMS machine, we need to quickly break out of the running operating system and type this at the console:
attach rq3 -r /tmp/licence.iso
When you’re back in OpenVMS, mount the image using the following command:
MOUNT/OVERRIDE=IDENTIFICATION DUA3
You can shorten OVERRIDE=IDENTIFICATION down to OVER=ID. This parameter tells OpenVMS to mount the image as-is, without trying to mount it according to the volume name.
We could run the script straight from our CD-ROM image by running @DUA3:[000000]VMS_PAKS.COM, but this won’t work – the line endings are wrong. To work around this, copy the file to your home directory and set some attributes on it:
COPY DUA3:[000000]VMS_PAKS.COM SYS$LOGIN
SET FILE/ATTRIBUTE=(RFM=STM) VMS_PAKS.COM
When you run @VMS_PAKS.COM, it’ll happily install all the licences. You can see what’s installed by running SHOW LICENSE:
Installing TCP/IP
Almost all conventional operating systems have an IP stack available by default. OpenVMS doesn’t, so it needs to be installed.
Before we install TCP/IP, we’ll need to increase the global pages value – by default, it’s 15000 and we need it to be higher.
EDIT/TPU SYS$SYSTEM:MODPARAMS.DAT
Add the following lines:
MIN_GBLPAGES=30000
ADD_INTSTKPAGES=12
Next, run AUTOGEN:
@SYS$UPDATE:AUTOGEN GETDATA SETPARAMS FEEDBACK
The installation is in the director TCPIP_VAX051 on the OpenVMS CD-ROM. We can mount it and install with the following commands:
MOUNT/OVER=ID DUA3:
SET DEFAULT DUA3:[TCPIP_VAX051.KIT]
PRODUCT INSTALL *
There isn’t much to configure with the initial installation, so we can start to configure:
@SYS$MANAGER:TCPIP$CONFIG.COM
Select option 1 – Core Environment, and option 2 – Interfaces. Select option 2 to use DHCP, and option 1 to enable DHCP_CLIENT.
That’s all folks
Wow, what a lot of work. Operating systems from decades past were installed and configured, then often never shut down for months or years. How times have changed.
TechRadar has a great article on securing printers, but how do you automate it? Well, with a certificate authority like Let’s Encrypt for starters, but there’s no mechanism for the printer to automatically update its certificate after it expires.
I’ve set my desktop machine to certbot and renew the certificate automatically. An evening’s hacking around the web interface showed it’s really easy to install a certificate automatically.
This is the magic command to install the certificate:
Replace HOSTNAME with the hostname of your printer and change /tmp/cert.pfx as required. If you want to know how to create the PFX file, see my original post.
Has anyone else found out how to do this? If they have, they’ve not posted about it!
Whilst testing out some PostgreSQL replication scenarios, I needed to have multiple instances of Postgres running under my user. I could have used multiple Docker machines with ports exposed, but I opted for another solution. Here’s how I did it.
First, I created /home/user/pgdata to hold the data directories, and /tmp/postgres to hold the UNIX socket files.
Then, it’s just a case of running /usr/lib/postgresql/12/bin/initdb /home/user/pgdata/1 -E UTF-8 to create a data directory, then editing postgresql.conf and changing the TCP port from 5432 to, say, 50432, and unix_socket_directories to /tmp/postgresql.
To start the server, run /usr/lib/postgresql/12/bin/pg_ctl -D /home/user/pgdata/1 -l logfile start, and to stop it, replace "start" with "stop". The final step is to create a postgres user with /usr/lib/postgresql/12/bin/createuser -drs postgres -h localhost -p 50432 and you’re away.
Some use cases I can think of for this are:
An isolated Postgres instance for integration testing
Trying out a new version of Postgres in parallel with your existing version